

In the world of web design, PSD to WordPress conversion has emerged as a popular and efficient solution for turning static designs into fully functional websites. This process involves transforming Photoshop Design (PSD) files into dynamic WordPress themes, enabling businesses and individuals to leverage the power and flexibility of the WordPress platform.
The significance of PSD to WordPress conversion lies in its ability to merge creative, custom designs with the robust functionality of WordPress. By converting a PSD design to WordPress, designers and developers can create websites that not only look stunning but are also responsive, SEO-friendly, and easy to manage. This makes it a preferred choice for businesses aiming to stand out in the competitive digital space.
The benefits of this conversion process are numerous. It ensures pixel-perfect design implementation, enabling websites to maintain the original design’s aesthetics across devices and browsers. Additionally, WordPress’s extensive library of plugins and tools allows for seamless functionality enhancements, providing greater customization and scalability.
This guide will provide a step-by-step walkthrough of the PSD to WordPress conversion process, highlighting essential practices and actionable solutions to common challenges. Whether you’re a web designer, front-end developer, or WordPress enthusiast, this guide will equip you with the knowledge to create powerful, visually appealing WordPress websites from your PSD designs.
WordPress Webdesign
Enhance your agency’s offerings with our WordPress website design services. Get custom, high-quality designs that fit your client’s needs.
Preparing for the Conversion
Before diving into the PSD to WordPress theme conversion process, proper preparation is essential to ensure a seamless and efficient workflow. This stage lays the foundation for transforming your design into a fully functional WordPress website.
Analyzing the PSD Design: Layers, Components, and Structure
The first step in the PSD to WordPress process is to thoroughly analyze the PSD file. Examine its layers, components, and overall structure to identify key design elements such as headers, footers, navigation menus, and content blocks. Properly grouped and labeled layers in the PSD file will simplify the slicing process, ensuring that each design element is accurately implemented in the WordPress theme.
Ensuring Design Responsiveness and Scalability
In today’s multi-device world, responsiveness and scalability are non-negotiable. During the PSD to WordPress theme preparation, assess how the design will adapt to various screen sizes. Ensure that all components, such as images, typography, and buttons, are scalable and can render seamlessly across devices. This step is critical for providing a consistent user experience and improving website performance.
Setting Up the Development Environment: Tools and Software Required
To begin the PSD to WordPress conversion, you need a robust development environment. Essential tools and software include:
- A Code Editor: Tools like Visual Studio Code or Sublime Text are ideal for writing and editing code.
- Local Server Software: XAMPP or WAMP provides a testing environment for WordPress development.
- Adobe Photoshop or Alternatives: Used to extract design elements from the PSD file.
- A WordPress Installation: Set up WordPress locally to test the theme in a controlled environment.
- Browser Developer Tools: For debugging and ensuring cross-browser compatibility.
By carefully preparing your PSD file, ensuring scalability, and equipping yourself with the right tools, you’ll set the stage for a smooth and effective PSD to WordPress theme conversion. This preparation phase is a critical step in achieving a high-quality, responsive WordPress website.
Slicing the PSD File
Slicing a PSD file is a fundamental step in converting a static design into a functional website. This process involves breaking down the PSD into smaller, manageable design components that can be used to build the website’s structure and appearance.
Understanding the Slicing Process
Slicing refers to dividing a design into individual elements, such as headers, buttons, backgrounds, and images. Each sliced component is then exported for use in coding the website. This step is crucial for ensuring that the final website faithfully represents the original design while being functional and adaptable.
Best Practices for Slicing: Maintaining Quality and Consistency
To achieve professional results, it’s essential to follow best practices during the slicing process:
- Preserve Original Quality: Use high-resolution images and export assets in the correct formats (e.g., PNG for transparent backgrounds, JPEG for photogrphs).
- Maintain Consistency: Ensure that all design elements align with the original PSD in terms of size, spacing, and colors.
- Optimize for Web: Compress images and assets to reduce load times without compromising quality.
- Focus on Responsive Design: Consider how each element will adjust across various screen sizes to maintain usability and aesthetic appeal.
Tools and Techniques for Efficient Slicing
Several tools and techniques can streamline the slicing process:
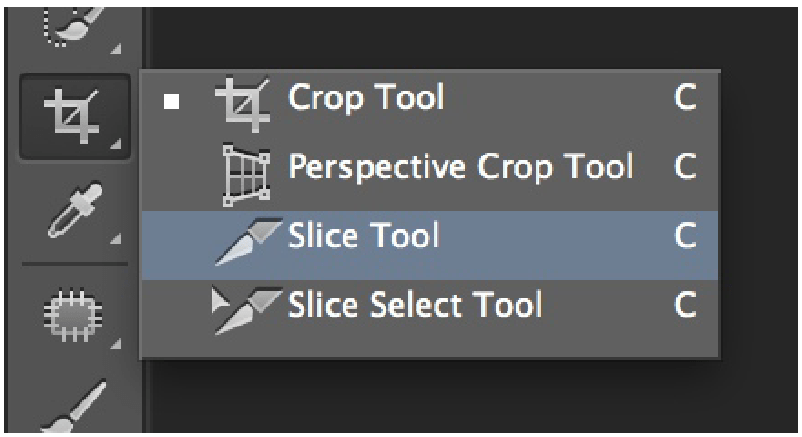
- Adobe Photoshop: Offers built-in tools like the Slice Tool to divide designs and export individual assets.
- GIMP: A free alternative to Photoshop that supports slicing and exporting.
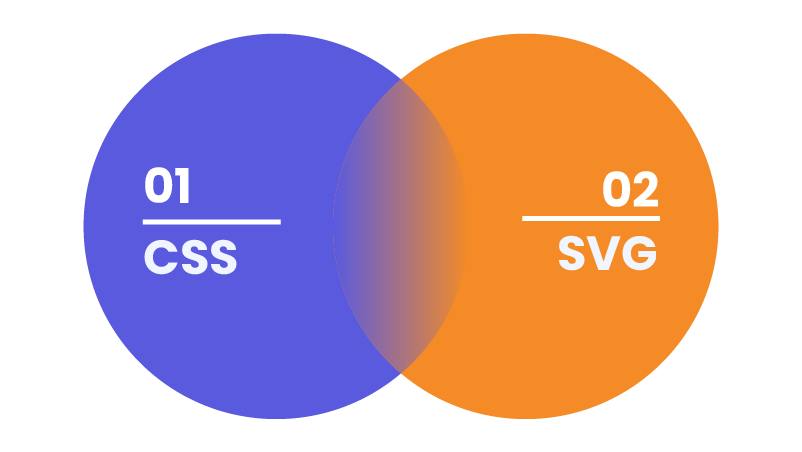
- CSS and SVG: For scalable elements, consider coding shapes and icons directly with CSS or exporting them as SVG files to ensure scalability and performance.
- Batch Export: Utilize batch export features in design software to save time when handling multiple assets.
Mastering the slicing process is key to maintaining the integrity of your design and ensuring a smooth transition into the development phase. By applying these techniques and tools, you can create high-quality, consistent assets ready for the next steps in building your website.

Converting PSD to HTML/CSS
The next step in the workflow involves converting the sliced design elements into a functional structure using HTML and CSS. This stage transforms static design files into a responsive, browser-compatible front-end layout.
Writing Semantic HTML5 Markup
Semantic HTML5 markup ensures that the website’s structure is meaningful and accessible. This involves using appropriate tags to define content, such as <header>, <nav>, <section>, and <footer>. Proper semantic markup:
- Improves search engine optimization (SEO).
- Enhances accessibility for screen readers.
- Simplifies collaboration by creating clear and logical code.
Styling with CSS3: Maintaining Design Fidelity
CSS3 is essential for styling the HTML structure to reflect the original design. This involves translating visual elements like typography, colors, spacing, and layout into code. To maintain design fidelity:
- Use exact color codes, font families, and spacing values from the design.
- Apply CSS variables for consistency and reusability across the site.
- Leverage advanced CSS3 features such as gradients, shadows, and transitions for modern styling.
Ensuring Cross-Browser Compatibility
Websites must function seamlessly across different browsers and platforms. To achieve this:
Insert Snippet:
- Test your code on major browsers like Chrome, Firefox, Safari, and Edge.
- Use tools like BrowserStack or LambdaTest for comprehensive testing.
- Apply vendor prefixes (e.g.,
-webkit-, -moz-) for CSS properties not yet fully standardized. - Avoid browser-specific hacks; instead, use progressive enhancement to ensure basic functionality is always available.
Implementing Responsive Design Principles
Responsive design ensures the website adapts to various screen sizes and devices. Key practices include:
- Using a mobile-first approach by designing for smaller screens first and scaling up.
- Applying media queries to adjust styles based on screen width, height, or resolution.
- Utilizing flexible grid systems and percentage-based widths for layouts.
- Ensuring touch-friendly design elements like larger buttons and proper spacing for mobile users.
By following these steps, you can create a robust, visually accurate front-end structure that is ready for the next stage of development. Attention to detail at this phase ensures a seamless user experience across devices and platforms.

Integrating HTML/CSS into WordPress
After building the static HTML and CSS layout, the next step is integrating it into WordPress to create a fully functional and dynamic website. This process involves adapting your HTML structure to fit within WordPress’s theme framework and leveraging its powerful features.
Understanding WordPress Theme Structure and Hierarchy
WordPress themes are organized based on a template hierarchy that dictates how content is displayed. Understanding this structure is key to ensuring your theme functions correctly. The hierarchy includes:
- index.php: The fallback template file if no other specific file is defined.
- header.php: Contains the website’s header, typically including the logo, navigation, and meta tags.
- footer.php: Manages the footer section with copyright information and closing tags.
- single.php: Displays individual posts.
- page.php: Used for static pages.
By breaking down your layout into these components, you can align your design with WordPress’s structure.
Breaking Down HTML into WordPress Template Files
To integrate your HTML layout into WordPress, divide it into template files that correspond to different sections of the site. For example:
- Place the
<head>section and opening<body>tag into header.php. - Add the closing
</body>and</html>tags into footer.php. - Insert the main content area into index.php, or create custom templates like single.php for specific content types.
- Separate reusable sections like sidebars into sidebar.php for easy inclusion across the site.
Incorporating WordPress Template Tags and Functions
Template tags and functions are the backbone of WordPress’s dynamic capabilities. Replace static content with these tags to make your site dynamic and customizable. Examples include:
<?php bloginfo('name'); ?>: Displays the site’s title.<?php wp_head(); ?>and<?php wp_footer(); ?>: Ensures necessary scripts and styles are loaded.<?php get_template_part(); ?>: Includes reusable template parts, such as headers or footers.<?php the_content(); ?>: Outputs the content of posts or pages.
By combining your HTML/CSS structure with WordPress’s dynamic functions, you create a theme that not only looks great but also offers powerful content management capabilities. Proper integration ensures your site is flexible, scalable, and easy to maintain.
Adding Dynamic Functionality
Once the static layout is integrated into WordPress, the next step in the PSD to WordPress conversion process is to add dynamic functionality. This transforms your website into a flexible platform capable of handling dynamic content, custom features, and user interactions.
Implementing WordPress Loops for Dynamic Content
The WordPress loop is at the heart of dynamic content generation. It retrieves and displays posts, pages, or custom post types based on your settings. By implementing the loop, your website can automatically display new content without requiring manual updates to the code. For example:
<?php if (have_posts()) : while (have_posts()) : the_post(); ?>
<h2><?php the_title(); ?></h2>
<p><?php the_content(); ?></p>
<?php endwhile; endif; ?>
This snippet ensures that your pages or blog posts dynamically display their titles and content.
Setting Up Custom Post Types and Taxonomies
To handle unique content requirements, such as portfolios, testimonials, or product listings, you can create custom post types and taxonomies. This adds more flexibility to the PSD to WordPress conversion process.
- Custom Post Types: Register custom content structures using the
register_post_type()function. - Taxonomies: Group related content using custom categories or tags with
register_taxonomy().
For instance, a custom post type for “Projects” with taxonomies for “Project Type” or “Industry” allows better organization and management of specialized content.
Integrating Widgets and Sidebars
Widgets and sidebars enhance your site’s usability by adding dynamic content areas for navigation, advertisements, recent posts, or social media feeds. During the PSD to WordPress conversion, you can define widget areas in the functions.php file:
function my_custom_sidebar() {
register_sidebar(array(
'name' => 'Main Sidebar',
'id' => 'main_sidebar',
'before_widget' => '<div class="widget">',
'after_widget' => '</div>',
'before_title' => '<h3>',
'after_title' => '</h3>',
));
}
add_action('widgets_init', 'my_custom_sidebar');
This code creates a sidebar where widgets can be added dynamically from the WordPress dashboard.

Utilizing Plugins to Extend Functionality
Plugins are essential for adding advanced features without reinventing the wheel. From SEO and e-commerce to contact forms and security, plugins simplify the PSD to WordPress conversion process by providing ready-made solutions. Popular plugins include:
- WooCommerce: For adding e-commerce functionality.
- Yoast SEO: For optimizing your site’s search engine performance.
- Elementor: For advanced page-building capabilities.
By implementing these dynamic features, your website becomes more powerful, user-friendly, and adaptable to various requirements, making the most of the PSD to WordPress conversion process.
Testing and Optimization
After completing the integration and functionality setup, the final step in creating a successful PSD to WordPress theme is thorough testing and optimization. This phase ensures that the website performs seamlessly across devices, loads quickly, adheres to SEO standards, and remains accessible to all users.
Conducting Cross-Browser and Cross-Device Testing
Testing your PSD to WordPress theme across multiple browsers and devices ensures consistent performance and design fidelity. Key steps include:
- Test on popular browsers such as Chrome, Firefox, Safari, and Edge to ensure compatibility.
- Use tools like BrowserStack or LambdaTest to emulate different devices and operating systems.
- Check for design consistency, functionality, and responsiveness across various screen sizes and resolutions.
Optimizing Performance: Minification, Caching, and Image Optimization
A fast-loading website is critical for user experience and search engine rankings. Optimize the PSD to WordPress theme by:
- Minifying CSS, JavaScript, and HTML: Use tools like WP Rocket or Autoptimize to reduce file sizes.
- Implementing Caching: Enable browser and server-side caching to improve load times. Plugins like W3 Total Cache or LiteSpeed Cache can handle this efficiently.
- Optimizing Images: Compress images using tools like TinyPNG or Smush to reduce file sizes without compromising quality. Consider using modern formats like WebP for further improvements.
Ensuring SEO Best Practices Are Implemented
Search engine optimization is essential for visibility. Enhance the PSD to WordPress theme with:
- Proper Meta Tags: Use plugins like Yoast SEO to manage title tags, meta descriptions, and schema markup.
- Clean URLs: Ensure permalinks are SEO-friendly by configuring WordPress settings.
- Sitemaps: Generate XML sitemaps and submit them to search engines for better indexing.
- Internal Linking: Incorporate logical internal links to guide visitors and improve navigation.
Accessibility Considerations and Compliance
An accessible website ensures inclusivity for all users, including those with disabilities. Key practices include:
- Using ARIA Roles: Add ARIA attributes to improve screen reader compatibility.
- Keyboard Navigation: Ensure the site is fully navigable using a keyboard alone.
- Contrast Ratios: Verify that text contrasts sufficiently with its background for readability.
- Compliance Standards: Aim to meet WCAG 2.1 guidelines for accessibility compliance.
By conducting rigorous testing and optimizing performance, SEO, and accessibility, you ensure that your PSD to WordPress theme is polished, professional, and ready for a seamless user experience across all platforms.
Deployment and Maintenance
The final stage of the project involves deploying the site to a live server and establishing a strategy for ongoing maintenance. This ensures the website is not only launched successfully but also remains functional, secure, and up-to-date over time.
Preparing the Site for Deployment: Final Checks and Backups
Before deploying the site, it’s crucial to perform a series of final checks to avoid issues after going live. Key steps include:
- Testing the Site Locally: Ensure all functionalities, links, forms, and navigation work as expected in your local environment.
- Creating a Backup: Generate a complete backup of the site, including the database and files. Tools like UpdraftPlus or manual FTP backups can be used.
- Reviewing SEO Settings: Double-check meta tags, robots.txt, and sitemaps to confirm they’re correctly configured for search engines.
- Validating Code: Use tools like W3C Validator to identify and fix any HTML or CSS errors.
Deploying to a Live Server: Steps and Considerations
Moving the site to a live server involves careful planning to ensure a smooth transition. The typical steps include:
- Selecting a Hosting Provider: Choose a reliable hosting service that matches the site’s performance and scalability needs.
- Transferring Files: Upload all website files to the server using an FTP client like FileZilla.
- Setting Up the Database: Export the local database and import it to the live server. Update the site’s configuration files with the live server’s database credentials.
- Updating URLs: Use tools like Search and Replace or commands in the database to ensure all URLs reflect the live domain.
- Testing Post-Deployment: After the site is live, test it thoroughly for any broken links, missing assets, or server errors.
Ongoing Maintenance: Updates, Security, and Backups
Launching the site is just the beginning; ongoing maintenance is essential to ensure optimal performance and security. Regular maintenance tasks include:
- Updating Software: Keep themes, plugins, and core software updated to prevent vulnerabilities.
- Monitoring Security: Use security plugins and conduct periodic scans to detect and fix potential threats.
- Performing Regular Backups: Schedule automated backups of the site to prepare for unexpected issues like data loss or server crashes.
- Tracking Performance: Monitor site speed, uptime, and user behavior using analytics and performance tools.
By following these steps, you can ensure a smooth deployment and establish a maintenance routine that keeps the site running efficiently and securely long after launch.
Common Challenges and Solutions
The process of building a website can come with its fair share of challenges. Whether it’s dealing with intricate designs, ensuring responsiveness, or addressing technical errors, understanding these hurdles and their solutions is essential for a successful project.
Handling Complex Designs
Complex designs with intricate elements, layered graphics, and detailed animations can be difficult to translate into a functional website. Solutions include:
- Break Down the Design: Divide the design into smaller components and tackle them one at a time.
- Leverage SVGs and CSS Animations: For detailed graphics and animations, use scalable vector graphics (SVGs) and CSS animation properties.
- Collaborate with Designers: Work closely with the original designer to clarify design details and adjust elements for practicality without compromising the overall look.
Addressing Responsive Design Issues
Creating a layout that adapts seamlessly across devices can be challenging, especially for complex designs. Key strategies include:
- Test Early and Often: Use tools like Google DevTools or responsive testing services to identify layout issues at various screen sizes.
- Apply a Mobile-First Approach: Design and code for smaller screens first, then scale up for larger devices.
- Use Flexible Units: Employ relative units like percentages and em rather than fixed pixel values for fluid designs.
- Prioritize Essential Content: Adjust layouts to ensure that the most important content remains visible on all screen sizes.
Troubleshooting WordPress-Specific Errors
Common WordPress errors, such as the “white screen of death” or plugin conflicts, can disrupt development. Here’s how to handle them:
- Enable Debugging Mode: Turn on WordPress’s debug mode to identify error messages and troubleshoot issues.
- Check Plugins and Themes: Deactivate all plugins and switch to a default theme to isolate the issue, then reactivate them one at a time to identify the source.
- Review Logs: Check server error logs for additional insights into the problem.
- Seek Community Support: WordPress forums and communities often provide solutions for common issues.
Ensuring Compatibility with Plugins and Themes
Integrating third-party plugins and themes can sometimes cause functionality conflicts. To address this:
- Stick to Trusted Plugins and Themes: Use well-reviewed and frequently updated options from reputable sources.
- Test Compatibility: Before final deployment, test the site extensively with the intended plugins and themes to ensure smooth functionality.
- Update Regularly: Keep all plugins and themes up to date to reduce the risk of conflicts due to outdated code.
- Custom Solutions When Needed: If conflicts persist, consider custom development to replace problematic third-party solutions.
By proactively addressing these challenges, you can ensure a smoother development process and deliver a website that is visually appealing, functional, and reliable.

Advanced Topics
As you deepen your understanding of PSD to WordPress, you may want to explore advanced techniques to enhance functionality and design flexibility. These topics allow you to customize your website further and integrate powerful features that elevate the user experience.
Implementing Custom Fields and Meta Boxes
Custom fields and meta boxes provide a way to add unique content to posts, pages, or custom post types. This is especially useful for complex layouts or dynamic content in a PSD to WordPress conversion.
- Custom Fields: Use WordPress’s built-in functionality or plugins like Advanced Custom Fields (ACF) to create additional input fields for specific data.
- Meta Boxes: Enhance the WordPress admin interface by adding meta boxes to collect and display additional content, such as product details or client testimonials.
- Practical Use Cases: Create custom pricing tables, event schedules, or portfolios with data stored in custom fields.
Creating and Using Child Themes
Child themes allow you to modify an existing theme without affecting the original theme files. This is particularly useful in PSD to WordPress projects where ongoing tweaks are required.
- Setting Up a Child Theme: Create a new folder in the
wp-content/themesdirectory and include astyle.cssandfunctions.phpfile. Reference the parent theme in thestyle.cssfile. - Benefits:
- Preserve changes during parent theme updates.
- Experiment with design and functionality without risk to the live site.
- Enable easy reversion to the original theme if needed.
- Best Practices: Only modify what’s necessary in the child theme to maintain simplicity and avoid conflicts.
Integrating Third-Party APIs and Services
To extend your site’s functionality, you can integrate third-party APIs and services into your PSD to WordPress project. Examples include:
- Google Maps API: Add interactive maps to your site.
- Payment Gateways: Integrate Stripe, PayPal, or other payment solutions for e-commerce functionality.
- Social Media Feeds: Pull in dynamic content from platforms like Instagram or X using their APIs.
- How to Integrate: Use
wp_remote_get()orwp_remote_post()for API calls, or leverage existing plugins when appropriate.
Utilizing Page Builders for Enhanced Design Flexibility
Page builders provide a user-friendly way to create complex layouts and designs without extensive coding. They are especially valuable for clients who want more control over their websites after a PSD to WordPress conversion.
- Popular Page Builders: Elementor, WPBakery, and Beaver Builder offer drag-and-drop functionality with extensive design options.
- Benefits:
- Accelerate the design process for complex layouts.
- Allow real-time previewing of changes.
- Enable non-technical users to customize the site.
- Considerations: Choose lightweight page builders to avoid performance issues, and customize builder templates for consistency with the original design.
WordPress Outsourcing Services
Enhance your agency’s capabilities with our WordPress outsourcing services. Get expert development, design, and maintenance support tailored to your needs.
From Design to Dynamic Websites
Converting a design into a fully functional website is a rewarding process that combines creativity and technical skill. From analyzing the initial design and preparing the development environment to testing and deploying the final product, each step plays a crucial role in ensuring a seamless transition from concept to reality.
For a successful project, remember these final tips:
- Pay close attention to design fidelity and ensure the website reflects the original vision.
- Test extensively across browsers, devices, and platforms to ensure consistency and reliability.
- Stay updated with the latest tools and techniques to enhance your efficiency and results.
- Always prioritize user experience, including responsiveness, accessibility, and performance optimization.
Whether you’re looking to streamline your workflow, tackle complex projects, or expand your agency’s capabilities, our expert team is here to help. With years of experience, we deliver high-quality solutions that save you time, resources, and effort.
Let us help you turn designs into powerful websites. Contact White Label Agency today to discuss how we can partner with you for your next project.


