
Why create a support ticketing system?
If you work at a marketing agency, chances are your inbox is filled to the brim day in and day out.
Webinar invites, meeting requests, design files to review. Getting to “inbox zero” seems more far-fetched than discovering a purple unicorn on your lunch break.

Buried amongst all those emails are requests from actual clients about specific changes to their website.
Support requests can very easily be overlooked, misplaced, and forgotten – leading to irritated clients and difficult phone calls.
Believe it or not, there is a better way
If your organization uses ClickUp there is a better way to handle support requests from your clients.
ClickUp offers a feature that allows you to create forms to gather customer feedback, questions, and requests.
In this article, we will go through setting up a website ticket board and support form in order to have all your client’s support tickets in one place.
Creating a support ticketing system with ClickUp
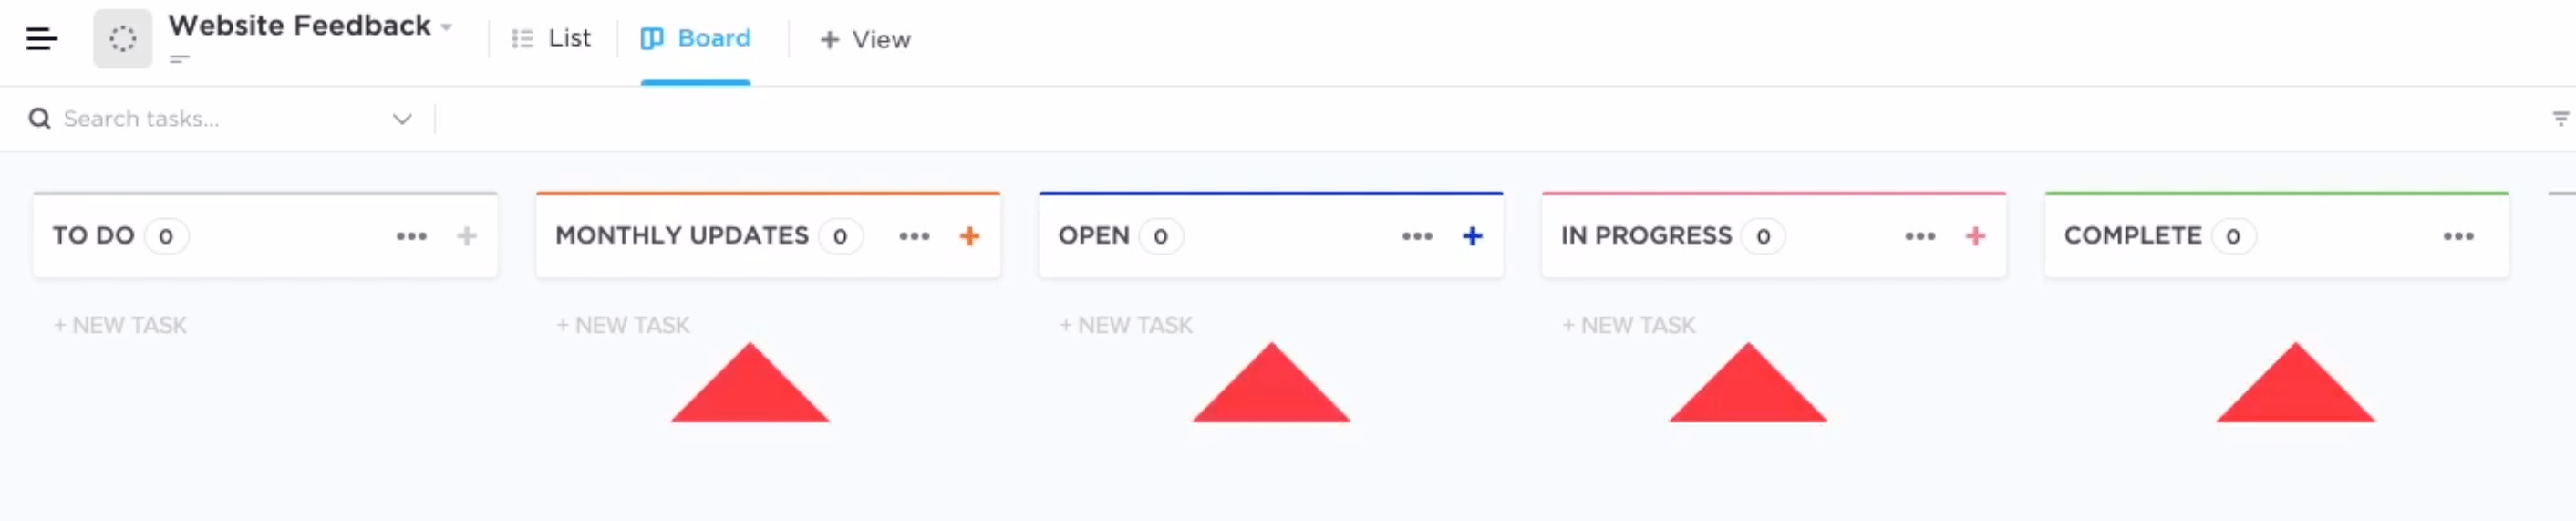
The first thing you will want to do is go into ClickUp and create a new list with statuses to match your workflow.
Our board is set up to handle WordPress maintenance requests from clients. All new tickets created by a client go into the TO-DO column by default. You can set your statuses to whatever matches your workflow best.
To create the form go up to the tabs at the top of the screen and click on View, then select Form.
ClickUp will load a screen with all the options for your new form.
Go ahead and give your form a name and description.
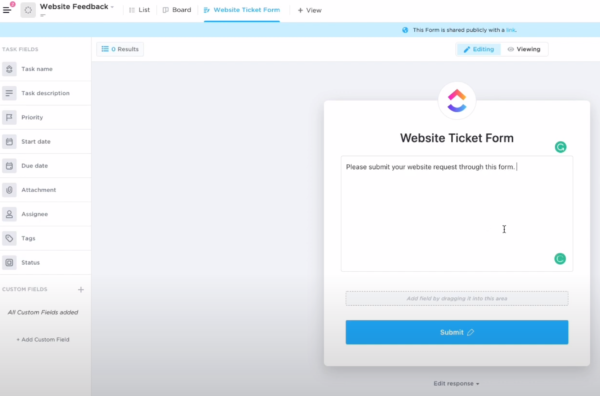
Then start adding the appropriate fields you want the user to fill out.
The values they enter into these fields will populate the ticket that makes it to the board.
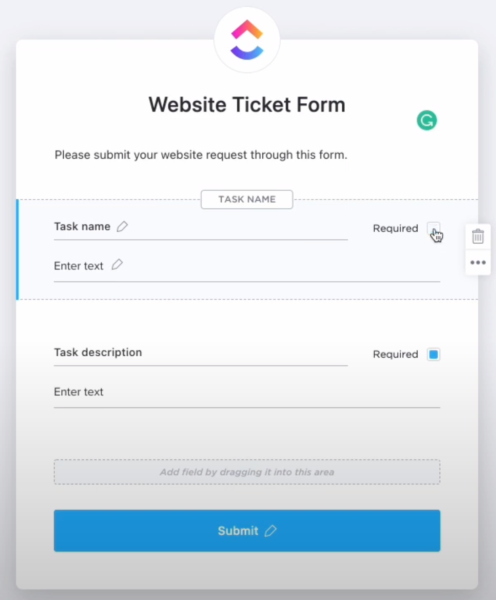
When selecting your fields keep in mind that you want it to be very clear to whoever is making the updates exactly what website needs to be addressed and any specifics that will help that person get the job done.
Doing so will prevent back-and-forth clarifications that can delay the request from being completed.
Using the required checkbox for certain fields will help to avoid any confusion.
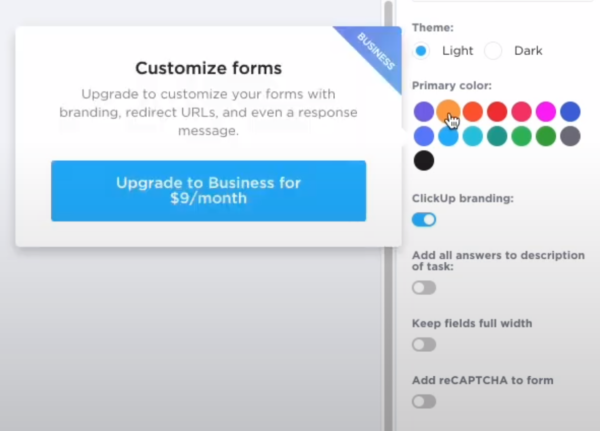
Once you have added all the fields to the form that you feel are necessary go ahead and style it with the options on the right-hand side.
Depending on your package level with ClickUp you may run into restrictions.
Those at the Business level will have access to all the options.
Click the Viewing button to see how the form will look to your clients.
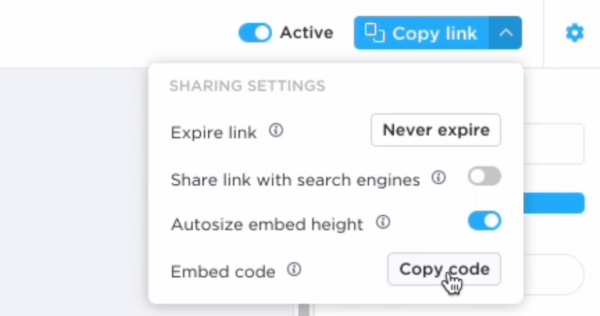
If you are satisfied with the form you can copy the link in the top right corner.
Provide the link on your website or directly to your clients to submit their website support tickets.
This same button has an option with a drop-down menu for copying an embed code.
The embed code can be used directly on your website or landing page allowing you even more control over the style and presentation of your form.
With the form live you are ready to start accepting tickets.
Clients will fill out your form and when they hit submit it no longer gets lost in your inbox.
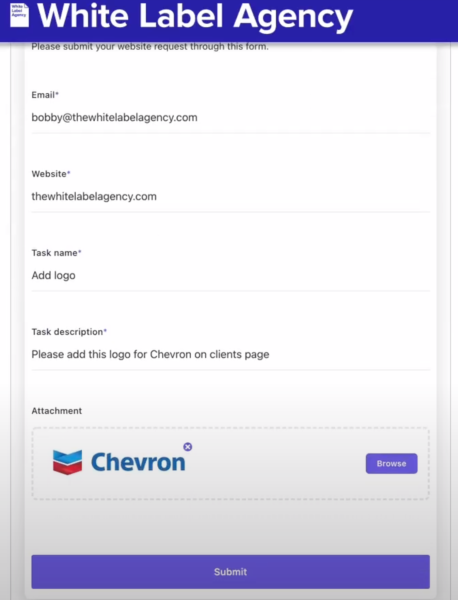
Instead, it will be nicely formatted and waiting as a ticket in the TO-DO column of your ClickUp board.

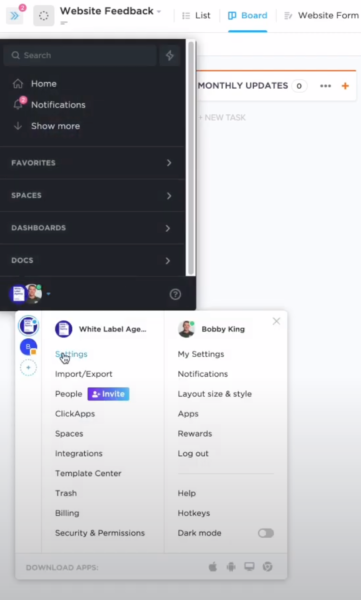
If you still prefer to have an email notification that can be turned on by going to settings and clicking the notification option for new tasks.
Real-world application
We use this method for our white label maintenance service and our partners are thrilled the requests no longer need to go through them.
The tickets are created by their clients, handled by our professional WordPress team, and closed out.
If you are interested in such a service check out our maintenance page or reach out to one of our sales representatives.
Try it for yourself
I hope this article helped to explain a better way of handling client requests and inspired you to explore improving your own system.
Feel free to watch the video version of this article to get a more detailed view of how to set up ClickUp for your website support.
Thanks for reading and have a great day!