- Step 1: Assess Current Performance
- Step 2: Optimize Hosting and Server Settings
- Managed WordPress Hosting Service
- Step 3: Leverage Caching
- Step 4: Optimize Images
- Step 5: Minimize and Optimize Code
- Step 6: Reduce HTTP Requests
- Step 7: Content Delivery Network (CDN)
- Step 8: Optimize WordPress Database
- Website as a service
- Step 9: Use Lightweight Themes and Plugins
- Step 10: Enable GZIP Compression
- Step 11: Advanced Speed Techniques
- Step 12: Regular Updates and Maintenance
- WordPress maintenance plans
- Wrap Up
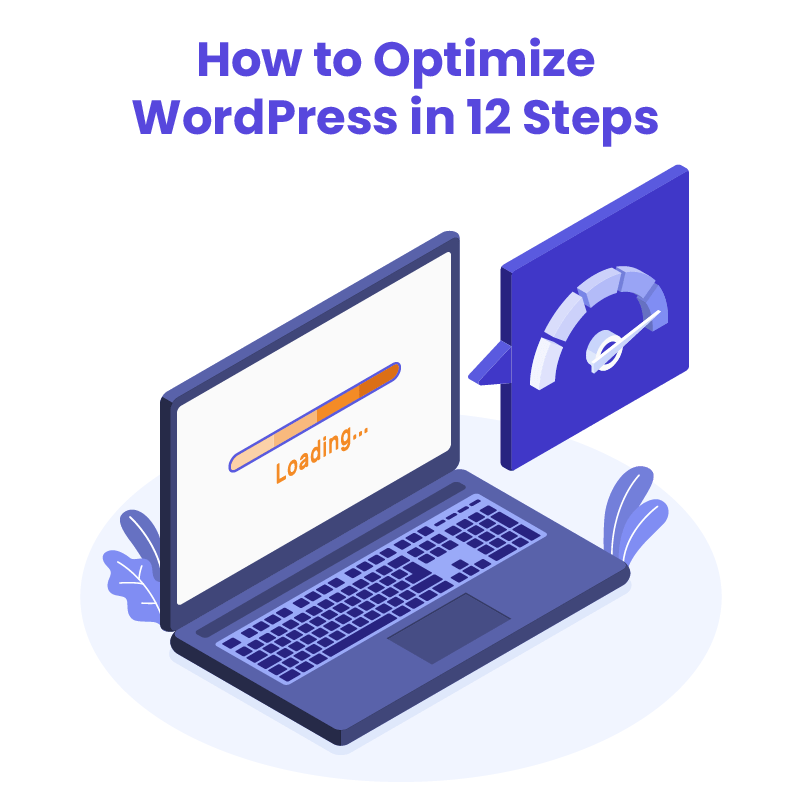
With users expecting lightning-fast browsing experiences and search engines prioritizing speedy websites in their rankings, optimizing your WordPress site’s performance has never been more critical. At White Label Agency, with our 12+ years of WordPress expertise, we’ve helped hundreds of marketing agencies deliver high-performing websites to their clients. In this comprehensive step-by-step guide, we’ll share our proven strategies for WordPress speed optimization that will transform your sluggish site into a high-performance machine.
Let’s get started and explore how to speed up a WordPress site in 12 steps.
Step 1: Assess Current Performance

Before making any changes to your WordPress site, it’s essential to understand exactly where you stand. You wouldn’t start renovating a house without first identifying what needs fixing, and the same principle applies to website optimization.
Performance testing gives you a baseline to measure improvements against and helps identify the specific bottlenecks slowing down your site. Without this crucial first step, you might waste time optimizing areas that aren’t causing significant slowdowns while ignoring the real culprits.
Key Tools for Speed Testing
Several excellent tools can provide detailed insights into your WordPress site’s performance:
- Google PageSpeed Insights: This free tool from Google analyzes your site’s content and provides suggestions for making your pages faster on both mobile and desktop devices.
- GTmetrix: GTmetrix combines data from Google Lighthouse and WebPageTest to provide comprehensive performance reports, including page load time, total page size, and number of requests.
- Pingdom: This tool allows you to test your website’s load time from different locations worldwide, giving you insights into how your site performs for users in various geographic regions.
Understanding Performance Metrics
When reviewing your speed test results, pay special attention to these key metrics:
- Time to First Byte (TTFB): How quickly your server responds to requests. Ideally, this should be under 200ms.
- Largest Contentful Paint (LCP): Measures when the largest content element becomes visible. For good user experience, aim for LCP to occur within 2.5 seconds.
- First Input Delay (FID): Measures the time from when a user first interacts with your site to when the browser can respond. Keep this under 100ms for optimal responsiveness.
- Cumulative Layout Shift (CLS): Quantifies unexpected layout shifts during page loading. Lower scores (under 0.1) indicate a more stable loading experience.
- Total Page Size: Smaller is better—aim to keep your pages under 2MB if possible.
Identifying Performance Bottlenecks
After running these tests, look for patterns in the recommendations. Common issues we encounter when optimizing client sites include:
- Unoptimized images
- Render-blocking JavaScript and CSS
- Excessive HTTP requests
- Poor server response times
- Lack of caching
- Bloated databases
Document all identified issues, prioritizing those with the highest potential impact on performance. This will become your optimization roadmap for the following steps.
Step 2: Optimize Hosting and Server Settings
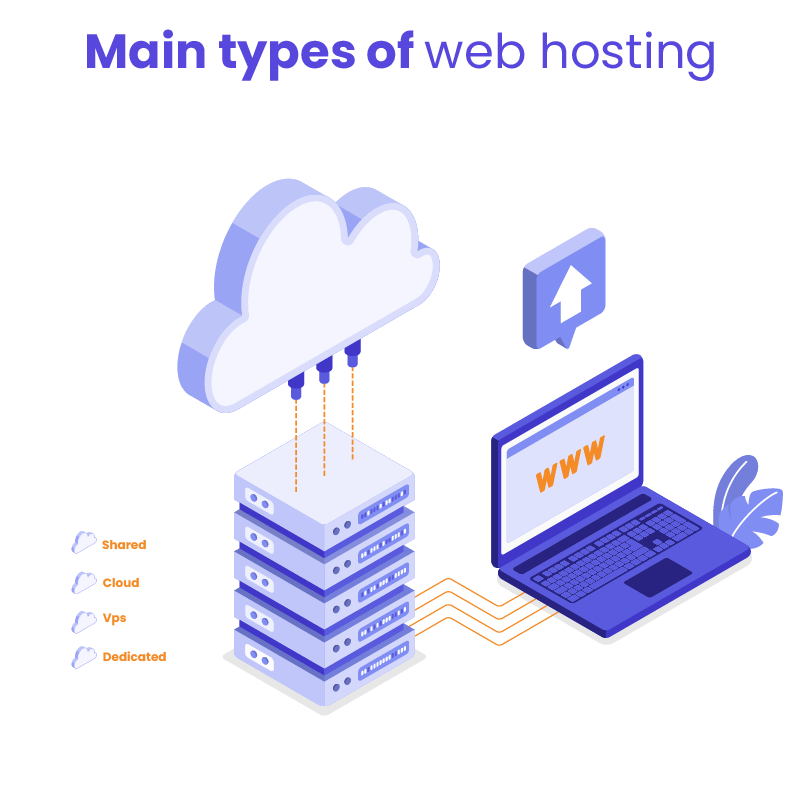
No amount of on-site optimization can overcome the limitations of poor hosting. Your hosting environment forms the foundation of your website’s performance, and choosing the right provider and configuration is crucial for achieving and maintaining optimal speed.
At White Label Agency, we’ve seen firsthand how a simple hosting upgrade can dramatically improve WordPress performance—sometimes cutting load times in half without any other changes. This makes hosting optimization one of the most impactful steps you can take.
Managed WordPress Hosting Service
Experience fast, secure, and reliable Managed WordPress hosting services. Boost performance, ensure site security, and enjoy 24/7 expert support.
Choosing the Right Hosting Solution
WordPress hosting options fall into several categories, each with different performance implications:
- Shared Hosting: The most economical option, but multiple websites share server resources, often resulting in slower performance during traffic spikes. Suitable only for low-traffic sites with minimal performance requirements.
- VPS (Virtual Private Server): Offers dedicated resources within a shared physical server. Provides better performance than shared hosting and is ideal for growing websites with moderate traffic.
- Dedicated Server: Gives you an entire physical server, providing maximum performance and customization. Best for high-traffic sites with specialized configuration needs.
- Managed WordPress Hosting: Purpose-built for WordPress with optimized server configurations and specialized support. Providers like WP Engine, Kinsta, and Flywheel offer excellent performance out of the box with WordPress-specific optimizations already implemented.
- Cloud Hosting: Distributes your site across multiple servers, offering excellent scalability and uptime. Services like AWS, Google Cloud, and DigitalOcean provide powerful infrastructure with pay-as-you-go pricing models.
For most WordPress sites we develop, we recommend at minimum a quality VPS or managed WordPress hosting solution. The performance gains typically justify the additional cost, especially when factoring in improved user experience and potential SEO benefits.
Recommendation
Have a look at our list of the best WordPress hosting providers in 2025.
Optimizing Server Configuration
Once you’ve selected an appropriate hosting provider, several server-side optimizations can further enhance performance:
- Update PHP Version: WordPress runs on PHP, and newer versions offer significant performance improvements. PHP 8.x can be up to 3x faster than PHP 7.0 for WordPress sites. Check your current PHP version and upgrade to the latest stable version compatible with your WordPress setup.
- Enable HTTP/2: This newer protocol allows multiple files to download simultaneously over a single connection, significantly reducing load times for media-rich sites. Most modern hosting providers support HTTP/2, but you may need to enable it manually or request activation.
- Implement SSL: While primarily a security feature, properly implemented SSL certificates can actually improve performance when combined with HTTP/2, which requires HTTPS. Many hosting providers offer free Let’s Encrypt certificates.
- Configure PHP Memory Limits: Increasing PHP memory limits (when possible in your hosting environment) can prevent performance issues caused by memory exhaustion. This can be done by modifying your wp-config.php file or through your hosting control panel.
Geographic Considerations
Server location significantly impacts load times due to the physical distance data must travel. Ideally, your server should be geographically close to the majority of your visitors. For businesses with a global audience, consider implementing a Content Delivery Network (CDN) to distribute content across multiple worldwide locations (we’ll cover this in more detail in a later section).
Step 3: Leverage Caching

Caching is one of the most powerful techniques for improving WordPress performance, yet it’s often misunderstood or improperly implemented. At its core, caching creates and stores static versions of your dynamic WordPress content, eliminating the need to generate pages from scratch with each visitor request.
When properly configured, caching can reduce server load by up to 80% and cut page load times by 2-5x. This creates a win-win situation: visitors enjoy a faster browsing experience while your server handles more traffic with fewer resources.
Understanding Different Caching Types
There are several layers of caching that can work together to optimize your WordPress site:
- Browser Caching: Instructs visitors’ browsers to store certain files locally for a specified period. When implemented correctly, returning visitors won’t need to download these resources again, resulting in significantly faster page loads.
- Page Caching: Generates HTML files of your WordPress pages and serves these static files to users instead of processing PHP scripts for each request. This dramatically reduces server processing time.
- Object Caching: Stores the results of database queries to prevent WordPress from repeatedly making the same queries. This is particularly beneficial for sites with complex database operations.
- Opcode Caching: Improves PHP execution by storing precompiled script bytecode in memory, eliminating the need to load and parse scripts on each request.
Plugin Recommendations
Discover the best cash plugins for WordPress.
Advanced Caching Configuration Tips
To maximize the benefits of caching, consider these advanced configuration strategies:
- Adjust Cache Lifetimes: Balance freshness and performance by setting appropriate cache expiration times. Static resources like images and CSS can be cached for longer periods (weeks or months), while dynamic content may require shorter cache lifetimes.
- Preload Cache: Many caching plugins offer a preloading feature that builds cache files before users visit pages. This ensures the first visitor to each page gets the same speed benefits as subsequent visitors.
- Exclude Dynamic Content: Identify parts of your site that should not be cached, such as shopping carts, user-specific content, or frequently updated elements. Most caching plugins allow you to exclude specific pages, cookies, or URL parameters.
- Mobile-Specific Caching: Consider creating separate cache versions for mobile devices if your site uses responsive design rather than a dedicated mobile theme.
Remember that caching configuration is not a one-size-fits-all solution. We recommend testing different settings to find the optimal balance between performance and content freshness for your specific WordPress site.
Step 4: Optimize Images

Images typically account for 50-80% of a webpage’s total size, making image optimization one of the most impactful steps in speeding up WordPress sites. We’ve seen cases where proper image optimization alone reduced page load times significantly, improving both user experience and search engine rankings.
However, the challenge lies in striking the right balance between visual quality and file size. At White Label Agency, we’ve refined our image optimization process to maintain excellent visual quality while significantly reducing file sizes. Below, you will find our best practices for how to speed up WordPress site with image optimization.
Image Compression Techniques
There are two primary types of image compression:
- Lossless Compression: Reduces file size without sacrificing any image quality. This is ideal for graphics with text, logos, or illustrations with sharp edges.
- Lossy Compression: Achieves greater file size reduction by selectively discarding some image data. When applied carefully, the visual difference is negligible to the human eye, especially for photographs.
For most WordPress sites, a combination of both approaches works best: lossy compression for photographs and lossless for graphics and logos.
3 Best Tools for Image Optimization
Several excellent tools can automate the image optimization process:
- ShortPixel: Our preferred solution for client sites, offering an excellent balance of compression quality and ease of use. Their adaptive compression intelligently applies the right compression type to each image. The free tier includes 100 images monthly, with paid plans starting at $4.99/month.
- Smush: A popular free option with a user-friendly interface. The free version offers lossless compression with no file size limits, while the premium version adds lossy compression and bulk optimization.
- TinyPNG/TinyJPG: An excellent web-based tool for manual optimization. Their WordPress plugin also enables automatic optimization of uploaded images.
Implementing Lazy Loading
Lazy loading is a technique that defers the loading of off-screen images until users scroll to them. This reduces initial page load time and saves bandwidth. Since WordPress 5.5, basic lazy loading is built into the core platform, but additional implementation can enhance its effectiveness:
- WordPress Native Lazy Loading: Automatically applied to images with the loading=”lazy” attribute. No configuration is required for basic functionality.
- Advanced Lazy Loading Plugins: Plugins like WP Rocket and a3 Lazy Load offer more comprehensive lazy loading features, including support for iframes, videos, and background images.
Additional Image Optimization Strategies
Beyond compression and lazy loading, consider these additional techniques:
- Serve Properly Sized Images: Always resize images to the actual dimensions needed for display. Avoid uploading 4000px images when you only need 800px display size.
- Implement WebP Format: This modern image format offers superior compression compared to JPEG and PNG. Tools like ShortPixel can automatically create and serve WebP versions of your images to compatible browsers.
- Use SVG for Graphics: For logos, icons, and simple illustrations, vector-based SVGs offer perfect scaling at minimal file sizes.
- Optimize Responsive Images: Ensure your site serves appropriately sized images for different screen resolutions using the srcset attribute.
- Remove Unnecessary Image Metadata: Strip EXIF data and other metadata from images to further reduce file sizes.
By implementing these image optimization techniques, you’ll reduce page weight and loading times while maintaining visual appeal—a critical balance for engaging, high-converting WordPress sites.
Step 5: Minimize and Optimize Code
Bloated, inefficient code is another common culprit behind sluggish WordPress sites. Every unnecessary line of HTML, CSS, or JavaScript increases file sizes, extends parsing times, and ultimately slows down the user experience.
Code optimization involves three key processes: minification, combining files, and eliminating redundant code. When implemented correctly, these techniques reduce file sizes, decrease HTTP requests, and streamline browser rendering—all contributing to faster page loads.
Minification Explained
Minification is the process of removing unnecessary characters from code without changing its functionality. This includes:
- Removing comments and whitespace
- Shortening variable names
- Eliminating unused code
- Optimizing code patterns
For example, this CSS:
css
/* Navigation styling */
.main-navigation {
background-color: #ffffff;
box-shadow: 0px 2px 5px rgba(0, 0, 0, 0.1);
padding: 20px;
}
Would be minified to:
css
.main-navigation{background-color:#fff;box-shadow:0 2px 5px rgba(0,0,0,.1);padding:20px}
While this makes the code less readable for humans, it significantly reduces file size and parsing time for browsers.
2 Recommended Tools for Code Optimization
Several excellent plugins can handle code optimization for WordPress sites:
- Autoptimize: Our go-to recommendation for most client sites. It offers robust minification and combination of HTML, CSS, and JavaScript with intuitive configuration options. The free version is sufficient for most needs.
- WP Rocket: In addition to its caching capabilities, WP Rocket includes excellent code optimization features. Its integrated approach ensures compatibility between caching and minification.
Advanced Code Optimization Techniques
Beyond basic minification, consider these advanced techniques:
- Critical CSS Implementation: Extract and inline the CSS needed for above-the-fold content, allowing the page to render quickly while the rest of the styles load asynchronously. Several plugins including WP Rocket and Autoptimize offer this feature.
- JavaScript Optimization:
- Defer Non-Critical JavaScript: Prevent JavaScript from blocking page rendering by deferring its execution until after the page loads.
- Asynchronous Loading: Load scripts asynchronously when they don’t depend on page rendering.
- Load JavaScript Only When Needed: Use plugins like Perfmatters or Asset CleanUp to disable scripts on pages where they’re not used.
- CSS Optimization:
- Remove Unused CSS: Identify and eliminate CSS rules that aren’t actually used on your pages.
- Optimize CSS Delivery: Consider using tools like UnCSS to automatically remove unused CSS.
- Remove Query Strings: Remove version numbers from static resources to improve caching effectiveness.
Dealing with Third-Party Scripts
Third-party scripts for analytics, advertising, or social media functionality often cause significant performance issues. Handle them carefully with these strategies:
- Audit External Scripts: Regularly review all third-party scripts and remove those providing minimal value relative to their performance cost.
- Delay Loading: Use techniques to delay loading non-essential scripts until user interaction or after critical content has loaded.
- Self-Host When Possible: Consider self-hosting scripts like Google Analytics or Font Awesome rather than loading them from external servers.
- Use Tag Managers: Implement Google Tag Manager or similar tools to better control the loading behavior of multiple third-party scripts.
When implementing code optimization, always test thoroughly after making changes. While rare, minification can sometimes cause layout or functionality issues that need to be addressed through exclusion rules in your optimization plugins.
Step 6: Reduce HTTP Requests
Every file your WordPress site loads—whether it’s an image, script, stylesheet, or font—requires an HTTP request. Each request adds to the page load time, creating a cumulative effect that can significantly slow down your site. Modern browsers typically limit concurrent connections to a single domain (usually between 6-8), meaning excessive requests create a queue that delays page rendering.
In our WordPress speed optimization work at White Label Agency, we’ve found that reducing HTTP requests often yields one of the most significant performance improvements—sometimes cutting load times by 30-50% with minimal effort. This makes it an essential strategy in any WordPress speed optimization plan.
Strategies for Reducing File Requests
Several approaches can effectively minimize the number of HTTP requests your site generates:
- Combining CSS and JavaScript Files: Instead of loading multiple small CSS or JavaScript files, combine them into fewer, larger files. This reduces connection overhead and allows browsers to process content more efficiently. Most WordPress speed optimization plugins like WP Rocket and Autoptimize offer this functionality.
- Implementing CSS/JavaScript Sprites: A sprite combines multiple images into a single file, using CSS to display only the relevant portion. This technique is particularly effective for interface elements like icons and buttons.
css
/* Instead of loading 20 separate icon files */
.icon-home { background: url('sprite.png') 0 0; }
.icon-user { background: url('sprite.png') -20px 0; }
.icon-search { background: url('sprite.png') -40px 0; }
- Inline Critical Resources: For small CSS or JavaScript files (under 10KB), consider inlining the code directly into your HTML rather than linking to external files. This eliminates requests while allowing important rendering code to load immediately.
- Font Optimization: WordPress fonts can generate multiple requests. Consider these optimizations:
- Limit font weights and styles to those you actually use
- Use system fonts where appropriate
- Consider font subsetting to include only needed characters
- Self-host fonts instead of using third-party services
Identifying and Managing Third-Party Scripts
External scripts from analytics tools, social media widgets, advertising networks, and other third-party services often account for a significant portion of HTTP requests. Here’s how to manage them:
- Conduct a Script Audit: Use browser developer tools (Network tab) to inventory all scripts loading on your site and identify their purpose and impact.
- Eliminate Unnecessary Scripts: Remove any third-party scripts that aren’t providing sufficient value relative to their performance cost.
- Consolidate Functionality: Replace multiple single-purpose tools with comprehensive alternatives. For example, one complete marketing suite might replace separate tools for popups, social sharing, and analytics.
- Implement Async and Defer Attributes: For essential third-party scripts, add async or defer attributes to prevent them from blocking page rendering:
html
<script src="analytics.js" async></script>
<script src="non-critical.js" defer></script>
Practical Implementation Tips
When reducing HTTP requests, consider these practical tips from our development experience:
- Use Chrome DevTools: The Network panel in Chrome’s developer tools provides detailed information about each request, helping you identify candidates for optimization.
- Consider Load Order: Prioritize requests for above-the-fold content to improve perceived performance.
- Test Thoroughly: After reducing requests, test your site thoroughly to ensure functionality hasn’t been compromised, especially if you’ve combined files or removed scripts.
- Set Reasonable Goals: While reducing requests is important, don’t sacrifice necessary functionality. Aim for balance rather than an arbitrary request count.
By implementing these WordPress page speed optimization strategies, most sites can reduce HTTP requests, often bringing the total number below 50 for optimal performance—a considerable improvement over the 100+ requests common on unoptimized sites.
Step 7: Content Delivery Network (CDN)
A Content Delivery Network (CDN) can also dramatically accelerate your WordPress site by distributing your static content across a global network of servers. When a user visits your site, content is served from the nearest server location rather than your origin server, reducing latency and improving load times—especially for visitors located far from your hosting server.
How CDNs Benefit WordPress Sites
CDNs offer several key performance advantages:
- Reduced Latency: By serving content from locations closer to your visitors, a CDN minimizes the physical distance data must travel, reducing latency and improving response times.
- Improved Concurrency: CDNs allow browsers to download resources from multiple domains simultaneously, bypassing the connection limits imposed on a single domain.
- Load Distribution: CDNs reduce the burden on your origin server by handling a significant portion of your traffic, improving stability during traffic spikes.
- Built-in Optimizations: Many CDNs automatically optimize delivered content through compression, image optimization, and minification.
- Enhanced Security: Leading CDNs include security features like DDoS protection, rate limiting, and Web Application Firewalls (WAF).
5 Recommended CDN Providers
Several excellent CDN options are available for WordPress sites, each with different strengths:
- Cloudflare: Our most frequently recommended solution due to its generous free tier and comprehensive feature set. Beyond basic CDN functionality, Cloudflare offers security protection, optimization tools, and edge computing capabilities.
- BunnyCDN: An affordable, user-friendly option with excellent performance metrics. Their straightforward pricing model (based on bandwidth usage) makes it accessible for smaller sites.
- KeyCDN: A developer-friendly option with pay-as-you-go pricing and robust API support. Particularly good for sites with fluctuating traffic patterns.
- StackPath: A security-focused CDN offering advanced protection features alongside content delivery. Well-suited for sites handling sensitive information.
- Amazon CloudFront: Part of AWS, CloudFront offers global scale and integration with other Amazon services. Ideal for larger sites already using AWS infrastructure.
Implementing a CDN with WordPress: 2 Common Methods
Setting up a CDN with WordPress is straightforward with these approaches:
Method 1: Using a Plugin
Several plugins simplify CDN integration:
- WP Rocket: Includes built-in CDN configuration for any provider.
- W3 Total Cache: Offers comprehensive CDN integration options.
- CDN Enabler: A lightweight plugin focused specifically on CDN implementation.
The typical setup process involves:
- Signing up with a CDN provider
- Creating a CDN “pull zone” or distribution
- Configuring your WordPress plugin with your CDN URL
- Testing to ensure content is being properly served through the CDN
Method 2: Cloudflare Integration
Cloudflare integration is especially straightforward:
- Sign up for a Cloudflare account
- Add your website and follow the DNS configuration instructions
- Update your domain’s nameservers to point to Cloudflare
- Configure Cloudflare settings for optimal performance
Optimizing CDN Configuration
To maximize CDN benefits, consider these configuration tips:
- Cache-Control Headers: Set appropriate cache expiration times through HTTP headers to ensure optimal content freshness.
- Configure File Types: Typically, you should include static assets like images, CSS, JavaScript, fonts, and PDFs in your CDN configuration, while excluding dynamic content.
- HTTPS Implementation: Ensure your CDN properly supports HTTPS with valid SSL certificates for all distributed content.
- Origin Shield: If your CDN offers this feature, enable it to reduce load on your origin server by adding an additional caching layer.
- Preloading: Some CDNs allow you to preload frequently accessed content to ensure it’s available across all edge locations.
While a CDN offers significant performance benefits, it’s important to monitor its implementation. Occasionally, poorly configured CDNs can introduce issues like mixed content warnings or caching problems. Regular testing with tools like WebPageTest or GTmetrix will help ensure your CDN is properly optimized.
Step 8: Optimize WordPress Database
Your WordPress database is the foundation of your site’s data structure—storing everything from posts and pages to comments, user information, and plugin data. Over time, as content is added, edited, and removed, databases often become bloated with unnecessary data that can significantly impact your WordPress performance.
At White Label Agency, we’ve seen how database optimization can reduce query times and page load times, especially for content-heavy sites that have been running for several years. This makes database optimization a crucial aspect of comprehensive WordPress speed optimization.
Understanding Database Bloat
Several factors contribute to WordPress database bloat. Let’s have a look at the 5 most common causes:
- Post Revisions: WordPress saves a complete copy of a post each time you save it. For frequently edited posts, this can lead to dozens of revisions in the database.
- Transients: These are temporary pieces of cached data that sometimes don’t get deleted properly, especially after plugin deactivation.
- Spam Comments: Even when marked as spam, these comments remain in your database.
- Orphaned Data: Leftover metadata from deleted posts, plugins, or themes.
- Overhead: Deleted and updated records leave behind fragmented space that can slow database operations.
Database Optimization Strategies
Since you are already aware of common factors behind database bloat, now let’s talk optimization strategies. Below, you will find 3 effective approaches that will help you with your efforts in speed optimization in WordPress:
1. Clean Up Post Revisions
While revisions are useful for restoring previous content versions, they can accumulate rapidly:
- Limit Revisions: Add this code to your wp-config.php file to limit the number of revisions WordPress keeps:
php
define('WP_POST_REVISIONS', 5); // Limits to 5 revisions per post
- Delete Existing Revisions: Use a plugin like WP-Optimize or run a SQL query to remove existing revisions:
sql
DELETE FROM wp_posts WHERE post_type = "revision";
2. Manage Transients
- Clear Expired Transients: Delete transients that have expired but remain in the database.
- Plugin Deactivation Cleanup: When testing and removing plugins, ensure their transients are properly deleted.
3. Database Table Optimization
- Table Repair: Fix corrupted tables that may cause performance issues.
- Database Defragmentation: Reclaim wasted space and reorganize data for more efficient storage.
- Optimize Database Structure: Identify and fix inefficient database schema issues.
Recommended Database Optimization Tools
Several excellent tools can help you maintain a healthy WordPress database:
- WP-Optimize: Our preferred solution for most client sites. It offers a comprehensive set of database optimization features with a user-friendly interface. The free version covers essential optimization tasks, while the premium version adds advanced features like multisite support and scheduled cleanups.
- Advanced Database Cleaner: Provides detailed control over which database elements to clean, including orphaned metadata, transients, and plugin-specific tables.
- phpMyAdmin: For those comfortable with direct database access, phpMyAdmin provides complete control over your database structure and contents.
Setting Up Regular Maintenance
Database optimization shouldn’t be a one-time task. We recommend implementing a regular maintenance schedule:
- Scheduled Cleanups: Set up automated weekly or monthly database cleanups using WP-Optimize’s scheduling feature.
- Regular Audits: Quarterly, perform a more thorough review of database performance using a tool like Query Monitor to identify slow queries.
- Post-Plugin Removal Checks: After removing plugins, verify they haven’t left orphaned tables or data.
- Database Backups: Always back up your database before performing optimization tasks to prevent data loss.
Advanced Database Optimization Techniques
For sites with significant performance issues or high traffic, consider these advanced techniques:
- Database Indexing: Create custom indexes for frequently queried data to improve retrieval speed.
- Table Partitioning: For extremely large databases, consider partitioning tables to improve query performance.
- Database Replication: Implement read replicas to distribute database load for high-traffic sites.
- Database Caching: Implement object caching with Redis or Memcached to reduce database load.
Website as a service
Website As a Service [WAAS] provides complete website solutions including design, hosting, and maintenance through a convenient subscription model for Agencies.
Step 9: Use Lightweight Themes and Plugins

The theme and plugins you choose form the architectural foundation of your WordPress site, significantly impacting its performance. While feature-rich themes and multipurpose plugins may seem appealing with their extensive functionality, they often come with substantial performance costs.
At White Label Agency, we’ve witnessed dramatic speed improvements—sometimes 200-300% faster load times—simply by migrating sites from bloated multipurpose themes to streamlined, purpose-built alternatives. This makes theme and plugin selection one of the most consequential decisions for WordPress performance.
Selecting a Performance-Optimized Theme
When evaluating themes for performance, consider these criteria:
- Coding Standards: Look for themes that follow WordPress coding standards and best practices. Well-coded themes typically mention their adherence to standards in their documentation.
- Minimal Design Philosophy: Themes built with performance in mind typically advertise their lightweight approach. Keywords like “minimal,” “fast,” “optimized,” and “lightweight” in theme descriptions are good indicators.
- Focused Functionality: Choose themes designed specifically for your site type rather than multipurpose themes that include features for every possible scenario.
- Responsive Framework: Ensure the theme uses a lightweight, efficient approach to responsive design rather than loading separate resources for different device types.
- Regular Updates: Active maintenance is essential for performance and security. Check the theme’s update history to ensure regular improvements.
3 Performance-Focused WordPress Themes
Based on our development experience, these themes consistently deliver excellent performance:
- GeneratePress: A lightweight, customizable theme with a minimal footprint (less than 30KB). The free version offers excellent performance, while the premium version adds additional templates and features while maintaining speed.
- Astra: Popular for its clean code and sub-1-second load times on properly optimized sites. Its modular approach allows you to enable only the features you need.
- Kadence: A newer entry focusing on performance and Gutenberg compatibility. Its well-structured code base supports fast loading times.
Plugin Optimization Strategies
Plugins are often a more significant performance concern than themes. Here’s how to manage your plugin library effectively:
- Conduct a Plugin Audit:
- Document each active plugin and its specific purpose
- Identify any plugins with overlapping functionality
- Test WordPress performance with plugins deactivated one by one to identify performance bottlenecks
- Identify Performance-Intensive Plugins: Common culprits include:
- Page builders with front-end assets
- Social sharing plugins loading multiple scripts
- Related posts plugins with complex queries
- Statistic/analytics tools with frequent database writes
- Sliders and complex media galleries
- Replace Heavy Plugins: For essential functionality, seek lighter alternatives. For example:
| Heavy Plugin | Lightweight Alternative |
| Contact Form 7 | Ninja Forms Lite or WPForms Lite |
| Slider Revolution | Smart Slider 3 Lite or MetaSlider |
| Wordfence (full suite) | Sucuri or modular security approach |
| WooCommerce + many extensions | WooCommerce with more focused extension strategy |
- Consolidate Functionality: Use fewer, more comprehensive plugins rather than multiple single-purpose plugins. For example, one SEO suite instead of separate plugins for sitemaps, meta tags, and schema markup.
Code vs. Plugins: When to Use Custom Code
Sometimes custom code is more efficient than plugins:
- Simple Functionality: For basic features like adding Google Analytics, custom headers, or simple shortcodes, inline code is often more efficient than plugins.
- Site-Specific Features: When functionality is unique to your site and unlikely to need frequent updates, custom code may be preferable.
- Implementation Method: Add custom code via a site-specific plugin or theme’s functions.php file rather than using a “code snippets” plugin that may load unnecessary framework code.
Remember, however, that custom code requires maintenance and security oversight—responsibility shifts from plugin developers to your team. We recommend custom code only when the performance benefits clearly outweigh the maintenance considerations.
Step 10: Enable GZIP Compression
GZIP compression is a server-level technology that compresses website files before sending them to the visitor’s browser, which then decompresses and displays them. This process significantly reduces file sizes—typically compressing text files by 60-80%—resulting in faster download times and improved user experience.
Implementing GZIP compression is one of the most straightforward optimizations with remarkable impact. In our experience at White Label Agency, enabling GZIP typically reduces page weight with minimal implementation effort, making it one of the highest return-on-investment optimizations available.
How GZIP Compression Works
When a browser requests a webpage from a server with GZIP enabled:
- The server compresses the HTML, CSS, JavaScript, and text files using the GZIP algorithm
- The compressed files are sent to the user’s browser (significantly reducing transfer time)
- The browser decompresses the files before rendering the page
The entire process is handled automatically by the server and browser, requiring no action from the user.
Benefits of GZIP Compression
Implementing GZIP compression offers several advantages for speed optimization in WordPress:
- Reduced Bandwidth Usage: Smaller file sizes mean less bandwidth consumption, particularly beneficial for mobile users with limited data plans.
- Improved Loading Speed: Smaller files download faster, reducing wait times for users.
- Lower Hosting Costs: For sites on bandwidth-limited hosting plans, GZIP can reduce costs by minimizing data transfer.
- Better SEO Performance: Speed is a ranking factor, and compression can improve Core Web Vitals metrics.
Implementing GZIP Compression
There are several methods to enable GZIP compression on WordPress sites:
Method 1: Via .htaccess (Apache Servers)
For sites hosted on Apache servers, add these lines to your .htaccess file:
apache
# Compress HTML, CSS, JavaScript, Text, XML and fonts
AddOutputFilterByType DEFLATE application/javascript
AddOutputFilterByType DEFLATE application/rss+xml
AddOutputFilterByType DEFLATE application/vnd.ms-fontobject
AddOutputFilterByType DEFLATE application/x-font
AddOutputFilterByType DEFLATE application/x-font-opentype
AddOutputFilterByType DEFLATE application/x-font-otf
AddOutputFilterByType DEFLATE application/x-font-truetype
AddOutputFilterByType DEFLATE application/x-font-ttf
AddOutputFilterByType DEFLATE application/x-javascript
AddOutputFilterByType DEFLATE application/xhtml+xml
AddOutputFilterByType DEFLATE application/xml
AddOutputFilterByType DEFLATE font/opentype
AddOutputFilterByType DEFLATE font/otf
AddOutputFilterByType DEFLATE font/ttf
AddOutputFilterByType DEFLATE image/svg+xml
AddOutputFilterByType DEFLATE image/x-icon
AddOutputFilterByType DEFLATE text/css
AddOutputFilterByType DEFLATE text/html
AddOutputFilterByType DEFLATE text/javascript
AddOutputFilterByType DEFLATE text/plain
AddOutputFilterByType DEFLATE text/xml
# Remove browser bugs (only needed for really old browsers)
BrowserMatch ^Mozilla/4 gzip-only-text/html
BrowserMatch ^Mozilla/4.0[678] no-gzip
BrowserMatch \bMSIE !no-gzip !gzip-only-text/html
Header append Vary User-Agent
</IfModule>
Method 2: Via nginx.conf (Nginx Servers)
For sites running on Nginx servers, add this to your nginx.conf file:
nginx
gzip on;
gzip_comp_level 5;
gzip_min_length 256;
gzip_proxied any;
gzip_vary on;
gzip_types
application/atom+xml
application/javascript
application/json
application/ld+json
application/manifest+json
application/rss+xml
application/vnd.geo+json
application/vnd.ms-fontobject
application/x-font-ttf
application/x-web-app-manifest+json
application/xhtml+xml
application/xml
font/opentype
image/bmp
image/svg+xml
image/x-icon
text/cache-manifest
text/css
text/plain
text/vcard
text/vnd.rim.location.xloc
text/vtt
text/x-component
text/x-cross-domain-policy;
Verifying GZIP Implementation
After setting up GZIP compression, verify it’s working properly:
- Use an online tool like Check GZIP Compression or GIDZipTest to verify compression is active.
- Check for any issues in your browser’s developer tools. Look for errors in the Console tab or examine individual file sizes in the Network tab.
- Run a performance test using tools like GTmetrix or PageSpeed Insights to confirm improved load times.
Compression Considerations
While implementing GZIP compression, keep these points in mind:
- Already Compressed Files: Don’t attempt to compress already compressed files like JPEGs, PNGs, or PDFs. This wastes server resources without meaningful benefits.
- Compression Levels: Most servers allow you to set compression levels (typically 1-9). Higher levels provide greater compression but require more server CPU. Level 4-6 typically offers the best balance.
- Compatibility: GZIP is supported by all modern browsers, but for very old browsers (pre-2010), you may need fallback methods.
- Alternative Compression: Brotli is a newer compression algorithm that offers even better compression rates than GZIP. If your server supports it, consider implementing Brotli alongside or instead of GZIP.
By implementing GZIP compression, you’ll significantly reduce your site’s bandwidth usage and improve loading times with minimal effort—making it one of the most efficient optimizations available for WordPress sites.
Step 11: Advanced Speed Techniques
Once you’ve implemented the fundamental WordPress speed optimization strategies in the previous sections, it’s time to explore advanced techniques that can push your WordPress performance even further. These methods require more technical understanding but can yield significant improvements, especially for sites already performing reasonably well.
At White Label Agency, we’ve found these advanced WordPress page speed optimization techniques particularly valuable for high-traffic sites where even small performance gains translate to meaningful improvements in user experience and conversion rates.
Resource Prioritization and Loading Strategies
How resources load is often as important as how large they are. These techniques focus on optimizing the loading sequence and behavior:
1. Defer Parsing of JavaScript
JavaScript parsing blocks page rendering, potentially causing significant delays. Deferring non-critical JavaScript allows the page to render before executing scripts:
html
<script src="script.js" defer></script>
For inline JavaScript, you can use:
html
<script>
document.addEventListener('DOMContentLoaded', function() {
    // Your code here
  });
</script>
2. Resource Hints
Resource hints allow you to inform browsers about resources they’ll need, enabling more intelligent loading:
Preload: Tells the browser to download a resource as soon as possible:
html
<link rel="preload" href="critical-font.woff2" as="font" type="font/woff2" crossorigin>
Prefetch: Suggests resources that might be needed for future navigation:
html
<link rel="prefetch" href="/next-likely-page.html">
Preconnect: Establishes early connections to important third-party domains:
html
<link rel="preconnect" href="https://fonts.googleapis.com">
DNS-Prefetch: Resolves domain names before resources are requested:
html
<link rel="dns-prefetch" href="https://analytics.example.com">
Implementation: These can be added via the wp_head action in your theme’s functions.php file or through plugins like WP Rocket or Perfmatters.
Critical Rendering Path Optimization
The Critical Rendering Path (CRP) represents the sequence of steps browsers take to convert HTML, CSS, and JavaScript into actual pixels on the screen. Optimizing this path can dramatically improve perceived performance:
1. Inline Critical CSS
Extract and inline the CSS needed for above-the-fold content, while loading the rest asynchronously:
html
<style>
  /* Critical CSS here */
  header { background-color: #fff; }
  .hero { height: 500px; }
</style>
<link rel="preload" href="main.css" as="style"
onload="this.onload=null;this.rel='stylesheet'">
<noscript><link rel="stylesheet" href="main.css"></noscript>
Implementation tools:
- Critical CSS generator plugins like WP Rocket or Autoptimize (premium version)
- Online tools like Critical CSS Generator
2. Optimize Font Loading
Fonts can significantly impact the CRP. Implement these strategies:
1. Use font-display Property:
css
@font-face {
  font-family: 'MyWebFont';
  src: url('webfont.woff2') format('woff2');
  font-display: swap; /* Prevents invisible text while fonts load */
}
2. Subset Fonts: Include only the characters you actually use to reduce file size.
3. Self-Host Google Fonts: Download and host Google Fonts locally to eliminate third-party requests.
Server-Side Optimizations
Beyond client-side improvements, server configuration can significantly impact performance:
1. PHP Optimization
- Upgrade PHP Version: Simply upgrading from PHP 7.0 to PHP 8.0 can yield 30-50% performance improvements. Ensure compatibility with your WordPress version and plugins before upgrading.
- Enable OPCache: Add these settings to
php.ini:
Code
opcache.enable=1
opcache.memory_consumption=128
opcache.interned_strings_buffer=8
opcache.max_accelerated_files=4000
opcache.revalidate_freq=60
opcache.fast_shutdown=1
opcache.enable_cli=1
2. Database Optimization Beyond Basics
- Custom Database Indexes: Add indexes for frequently queried tables to improve query performance.
- Query Monitoring: Use the Query Monitor plugin to identify slow database queries and optimize them.
External Object Cache: Implement Redis or Memcached to reduce database load:
php
// Add to wp-config.php
define('WP_CACHE', true);
Edge Cases and Special Considerations
These approaches help with specific performance challenges:
- Single Page Applications (SPAs): For WordPress sites using React or Vue.js for the front end, implement code splitting and lazy loading to optimize performance.
- Multilingual Sites: Implement proper hreflang tags and consider serving region-specific content from geographically appropriate servers.
- E-commerce Performance: For WooCommerce sites, implement AJAX cart updates, optimize product images with auto-generated thumbnails, and consider headless implementations for catalog pages.
When implementing these advanced techniques, always test thoroughly across multiple devices and browsers. Some optimizations may have unexpected side effects, particularly for users with older browsers or unusual configurations. Incremental implementation with careful testing will ensure you gain performance benefits without introducing new problems.
Step 12: Regular Updates and Maintenance

WordPress sites aren’t static entities—they require ongoing attention to maintain optimal performance. Like a high-performance vehicle, regular maintenance prevents deterioration and ensures all components work efficiently together.
Regular updates also play a crucial role in site security. According to a 2023 WordPress security report, over 56% of compromised WordPress sites were running outdated versions of core, themes, or plugins—highlighting the dual benefit of maintenance for both performance and security.
Recommendation
Have a look at our comprehensive blog on WordPress website maintenance costs.
The Critical Nature of WordPress Core Updates
WordPress regularly releases three types of updates:
- Major Updates: These introduce new features and significant changes (e.g., WordPress 5.0, 6.0). They often include substantial performance improvements and should be applied after thorough testing.
- Minor Updates: These address bugs and security issues (e.g., WordPress 5.9.1, 6.0.2). They should be applied promptly as they frequently include important performance fixes.
- Security Updates: These address critical vulnerabilities and should be applied immediately.
Each new version of WordPress typically includes performance enhancements—from database query optimizations to improved core functions. WordPress 5.9, for instance, introduced performance improvements to the block editor that reduced loading times by up to 30% compared to previous versions.
Theme and Plugin Update Strategy
While keeping themes and plugins updated is essential, a strategic approach is recommended:
- Create a Staging Environment: Always test updates on a staging copy of your site before applying to production, especially for mission-critical sites.
- Review Changelogs: Before updating plugins or themes, review their changelogs to understand what’s changing and potential impacts.
- Prioritize Security Updates: Plugins with security patches should be updated immediately, while feature updates can be scheduled during regular maintenance windows.
- Update One at a Time: When applying multiple updates, implement them one by one to easily identify the source of any issues that arise.
- Maintain Update Documentation: Keep records of what was updated, when, and any issues encountered for troubleshooting reference.
Implementing a Maintenance Schedule
Based on our experience managing hundreds of client sites, we recommend this maintenance schedule:
| Frequency | Maintenance Tasks |
| Weekly | • Check for and apply security updates • Verify backup integrity • Quick performance scan |
| Monthly | • Apply non-critical plugin/theme updates • Database optimization • Thorough performance testing • Check for broken links |
| Quarterly | • Apply major WordPress updates • Remove unused plugins/themes • Review and optimize large media files • Check for code deprecations |
| Annually | • Comprehensive security audit • Code review for performance opportunities • Review hosting needs and potential upgrades • Verify SSL certificate renewal |
Automating WordPress Maintenance
Several approaches can help automate routine maintenance:
- Managed WordPress Hosting: Providers like WP Engine, Kinsta, and Flywheel include automatic updates and maintenance as part of their service.
- WordPress Maintenance Services: Professional services (like our maintenance packages at White Label Agency) handle updates, optimization, and security monitoring.
- Management Plugins: Tools like MainWP, ManageWP, or InfiniteWP allow centralized management of multiple WordPress sites.
- Automated Update Tools: Plugins like Easy Updates Manager or WP Automation can schedule updates based on your rules and preferences.
Potential Update Pitfalls and How to Avoid Them
While updates are essential, they occasionally introduce issues. Here’s how to minimize risks:
- Plugin Conflicts: New plugin versions sometimes conflict with other plugins or themes. Maintain a staging environment for testing updates before applying to your live site.
- Performance Regressions: Occasionally updates introduce performance issues. Compare site speed before and after significant updates using tools like GTmetrix.
- Deprecated Functions: Updates may deprecate functions your site relies on. Keep an eye on deprecation notices in your site’s debug logs.
- Visual Inconsistencies: Theme updates might change layout or styling elements. Perform visual QA after theme updates.
For critical business websites, we strongly recommend professional maintenance services to ensure updates are properly managed without disrupting WordPress performance or functionality.
WordPress maintenance plans
WordPress Maintenance Plans ensure site security, performance, and uptime. Choose custom plans with backups, monitoring, and unlimited content edits.
Wrap Up
Optimizing your WordPress site’s speed requires a systematic approach and ongoing attention. By implementing the strategies outlined in this guide—from proper hosting selection and image optimization to advanced techniques like resource prioritization—you can significantly improve your site’s performance. Each second saved in loading time directly impacts user engagement, conversion rates, and search engine rankings, making WordPress speed optimization a critical investment for any of your websites.
Remember that performance optimization is a continuous cycle of measurement, implementation, and refinement. As your WordPress site evolves, regular performance monitoring ensures you maintain the gains achieved while identifying new optimization opportunities.
At White Label Agency, our team of 100+ specialized WordPress developers has been optimizing WordPress sites for over a decade. We partner with marketing agencies to deliver websites that load quickly and convert effectively. Whether you need assistance with speed optimization or ongoing maintenance, contact our sales team to learn how we can help your agency deliver faster WordPress sites to your clients.