Divi is a WordPress theme that simplifies website development without the need for coding. It’s ideal for beginners who have no prior experience, as they can leverage the Divi WordPress tutorial to quickly learn and enhance their website-building skills.
The user-friendly design of Divi ensures easy navigation, although initially, any new platform can seem a bit daunting, particularly for novices. Understanding the complete workflow of Divi might pose a challenge, but it’s a hurdle that can be overcome with guidance.
At White Label Agency, we work with a wide range of WordPress themes, including Divi. As the world’s leading outsourcer of WordPress services to digital agencies, we’ve worked on over 10,000 projects, many using the Divi theme. Let us walk you through the basic Divi settings, to get you using this user-friendly WordPress theme like a professional designer.
Essential steps before you start using Divi
Ensuring your website is prepared for Divi customization involves a few preparatory steps. Before starting with the Divi WordPress tutorial it’s essential to purchase the website domain name and hosting. Without it, your website isn’t live on the Internet; no one can see it besides you. Once your hosting is set up, optimize plugins, focusing on security measures. Then, remove unnecessary plugins by deactivating them to avoid clutter and optimize your site’s speed.
Next, it’s time to install the Divi Theme. Download the Divi Theme and extract the zip file on your desktop. Upload the extracted Divi Theme folder and activate it. Complete the process by filling in your username and API key in the “updates” section to access the support system and receive future updates.

About Divi: An overview of its customization tools
Divi Theme offers a wide range of customization capabilities, including access to edit the font, size, borderlines, spacing between elements and text line-up. So you don’t have to get involved in coding or adjusting to CSS to modify elements of your website. A User-friendly interface and features, such as the Divi Library and the Theme Builder, make it easy to create and customize a website. The Divi Theme Builder is an add-on package that allows you to create or customize templates for different pages and sections. With the Theme Builder, you can create a unique design and experience for your site.
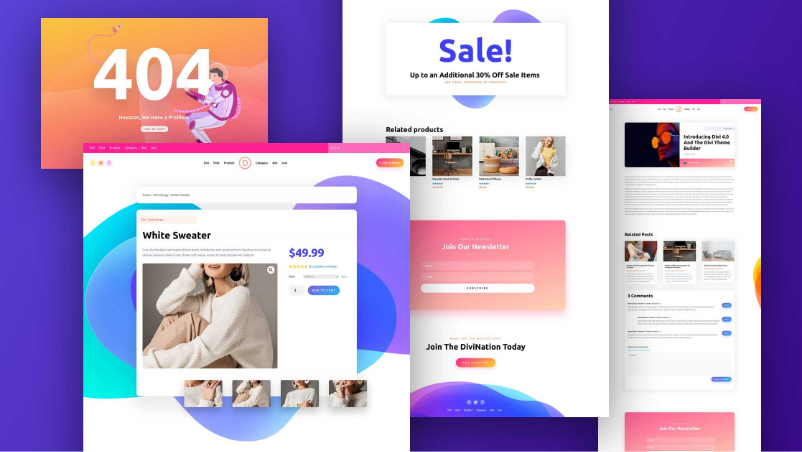
Divi comes with over 250+ pre-made layout packs designed by an in-house design team. You have access to hundreds of high-quality and professionally designed website layouts for free.
In Divi, sections represent the fundamental building blocks of the page builder. Within these sections, you can place rows and modules. Rows accommodate various column layouts and are embedded inside sections. Each row comes with a range of settings, accessible by clicking the settings icon located at the top left of the row.
A Divi module is a content element, which provides a drag-and-drop option. The block can be used anywhere within sections, rows, and columns to build layouts. modules have their individual settings, where you can adjust visual elements such as color selections, slider controls, or switches.
Divi WordPress theme
Create stunning websites with our custom Divi WordPress theme services. Fast, clean, and fully tailored to your client’s needs.
Fundamental steps to start with your Divi website
Divi stands out as one of the most popular WordPress themes, backed by a large community. This active community support is particularly advantageous for beginners seeking a guide to start their websites. In this Divi WordPress tutorial, let’s dive into the foundational steps necessary for your Divi project.
How to add a page on the Divi website
Using the ‘Blank Page’ template in Divi, you can disable the header and footer on a specific page, leaving only the content created with the builder visible. This feature is ideal for crafting unique landing pages distinct from the rest of your website. You can create various specialized pages such as sales landing pages, ‘coming soon’ pages, newsletter sign-up pages, or even maintenance mode pages. When setting up a new page, you’ll find a ‘Page Attributes’ settings box on the side of your screen. In this box, look for the ‘Template’ dropdown menu and select the ‘Blank Page’ template to apply this layout to your new page.
How to add more columns to your Divi builder posts or pages
- Preparation: Ensure you have an image of 300 x 200 pixels and CSS code ready for use
- Create a Page: Start by creating a new page in Divi
- Row Module Settings: Go to the settings of the row module on your page
- Set to Fullwidth: Choose the option to make the row fullwidth by selecting “Yes”
- Custom CSS: Under the Custom CSS tab, enter “six-columns” (as an example) in the CSS Class text box
- Save and Exit: Save your settings and exit the row module
- Insert a Column with Blurb Module: Add a column by selecting a single row, then insert a Blurb Module
- Configure Blurb Module Settings:
a. Under General Settings, set the title to ‘One’
b. Choose “Center” for text orientation
c. Add your text and upload the prepared image
d. In the Admin Label, type “1” - Save and Exit: Save these settings and exit the Blurb Module
- Duplicate the Blurb Module: Duplicate the Blurb Module settings five times to create multiple columns
- Publish Your Page: Click on “Update” to save and publish your changes
- Enter CSS Code: Navigate to “Theme Options” in the Divi menu, and enter your CSS code in the Custom CSS section
- Save Changes: Make sure to save your changes
Remember, you can adjust the number of columns anytime by modifying the Custom CSS in the Row Module Settings.
How to add a page on the Divi website
- Navigate to Pages: In your WordPress dashboard, go to the ‘Pages’ section
- Create a New Page: Click the ‘Add New’ button to start creating a new page
- Name Your Page: Enter a name for your page, such as ‘Home’, in the designated title area
- Publish Your Page: Once you have named your page, click ‘Update’ to publish it live on your website.”
Website as a service
Website As a Service [WAAS] provides complete website solutions including design, hosting, and maintenance through a convenient subscription model for Agencies.
How to add layout on your Divi website
- Start with Pages: Go to ‘Pages’ in your WordPress dashboard. You can either create a new page or edit an existing one.
- Activate Divi Builder: Click ‘Add New’ and then use the Divi Builder for your page.
- Choose Your Approach:
a. To build from scratch, click on the portability (⇅) icon. Select ‘Import’, then ‘No File
Selected’, and browse to choose your page layout file. Finally, click on ‘Import Divi Builder Layout’.
b. For a predefined layout using the visual builder, create a new page and click on the ‘Use Divi Builder’ button. Select ‘Visual Builder’ to see live changes and understand how they affect your website. Click on the ‘…’ (which opens the Divi builder settings on the front-end), then the ‘+’ button. Choose the ‘Predefined Layouts’ tab from ‘Load from Library’ and select any layout you prefer. - Layout Installation Complete: Following these steps, you have successfully installed a Divi layout directly onto your page.”
Adding a section, row and module in Divi
- Activate Visual Builder: First, enable the Visual Builder on your Divi website.
- Insert Row: Click on the green ‘Insert Row’ button.
- Choose Row Layout: Select your preferred row layout from the options provided.
- Add Module: From the ‘Insert Module’ menu, pick the module you want to add to your row.
- Confirm Selection: Click on the checkmark to finalize the addition of your module.
Update website icon and logo
Website icon:
- Go to WordPress Customizer.
- Navigate to General Settings > Site Identity.
- Update the website title and tagline.
- Upload your site’s icon (ensure it’s in a square format).
- Click ‘Publish.’
Website logo:
- From the dashboard, hover over ‘Divi.’
- Click on ‘Theme Options.’
- Locate the ‘Upload’ button next to the logo.
- Choose the image and click ‘Set Image.’
- Save changes.
Outsource your Divi projects with White Label Agency
If you’re pressed for time and unable to dive into the Divi WordPress tutorial, we are here to help. At White Label Agency, our focus is on custom-coding white-label WordPress websites, whether using Divi or any other WordPress theme. Our priority is to create websites to your specifications and timeline.
When we build your custom Divi WordPress theme, we make sure you get a clean, fast and smooth website to deliver to your client. As an invisible white-label partner, we build, manage, and oversee the project, adhering strictly to your specifications. Reach out to our sales team to join our growing network of partners.